📌 Quick facts: Most cities price deck permits from your project valuation, and a typical residential building permit runs roughly $300 to $2,000, about 0.5% to 2% of project cost. A deck up to 200 square feet, under 30 inches above grade, and freestanding is usually exempt under the model residential code. There are several legal ways to reduce deck permit costs, and the biggest ones cost you nothing but planning.
Deck quotes have a way of growing after the fact, and the permit line is one of the few you can shrink before anyone orders lumber. Homeowners who plan ahead reduce deck permit costs by building inside the exemption, right-sizing the footprint, trimming the declared valuation, and passing inspection on the first visit. None of that bends a rule.
This guide walks through each lever with the fee math cities actually use, the code thresholds that decide whether you need a permit at all, and the paperwork habits that stop small fees from multiplying.
Table of Contents
- 1How Cities Calculate Deck Permit Fees
- 2Start With the Exemption: The 200-Square-Foot Rule
- 3Right-Size the Build to Reduce Deck Permit Costs
- 4Shrink the Declared Valuation, Not the Deck
- 5Use Pre-Approved Plans Where Your City Offers Them
- 6Bundle the Work and Avoid Repeat Fees
- 7Pass Inspection the First Time
- 8Use the City's Own Fee Tools Before You Apply
- 9What Cost-Cutting Never Includes: Skipping the Permit
- 10Your Deck Permit Savings Checklist
How Cities Calculate Deck Permit Fees
Cities start from a declared project valuation, then apply a rate to it. Panama City's fee guide, for example, sets the building permit at the greater of a published minimum or the city valuation divided by 1,000 and multiplied by a set rate (Panama City permit fee schedule and valuation guide). Clatsop County explains the front half of that equation: the valuation comes from an ICC valuation table applied to your square footage, and the local fee schedule lands on top of it (Clatsop County dwelling permit fee calculation).
For a typical residential deck, the building permit with its plan review and issuance fees usually lands somewhere between $300 and $2,000 all in, or roughly 0.5% to 2% of what the project costs you. Small flat-fee towns sit at the bottom of that band. Valuation-based cities with full plan review sit near the top.
| Fee basis | How it works | Where you see it |
|---|---|---|
| Flat minimum fee | One set price regardless of deck size | Small towns and county offices |
| Valuation-based | Rate applied to declared labor and materials cost | Larger cities with plan review |
| Square-foot rate | Charge per square foot of deck area | Growth-market suburbs |
| Trade add-ons | Separate electrical or other trade permits if lights or outlets are included | Cities with dedicated trade desks |
Knowing which basis your city uses tells you which lever actually moves the number. A flat-fee town ignores your valuation entirely. A valuation-based city rewards every dollar you legitimately trim from the scope.
Plan review is usually the heaviest component for anything beyond a simple platform. Departments charge for the hours a plans examiner spends on your drawings, and submittals with custom stairs, attached roofs, or engineered footings consume more of those hours than a straightforward build. When you compare two towns, ask how plan review is billed. Some fold it into the permit fee, others invoice it separately at a percentage of the base.
Where does the permit land relative to the whole project? It is a small slice of a big build but a large slice of a small one. On a $30,000 deck in a valuation-based city, the permit typically runs 0.5% to 2% of that total. On a modest $8,000 platform in a flat-fee town, the permit can feel outsized at a few hundred dollars. Neither result is wrong. They are just different machines.
Start With the Exemption: The 200-Square-Foot Rule
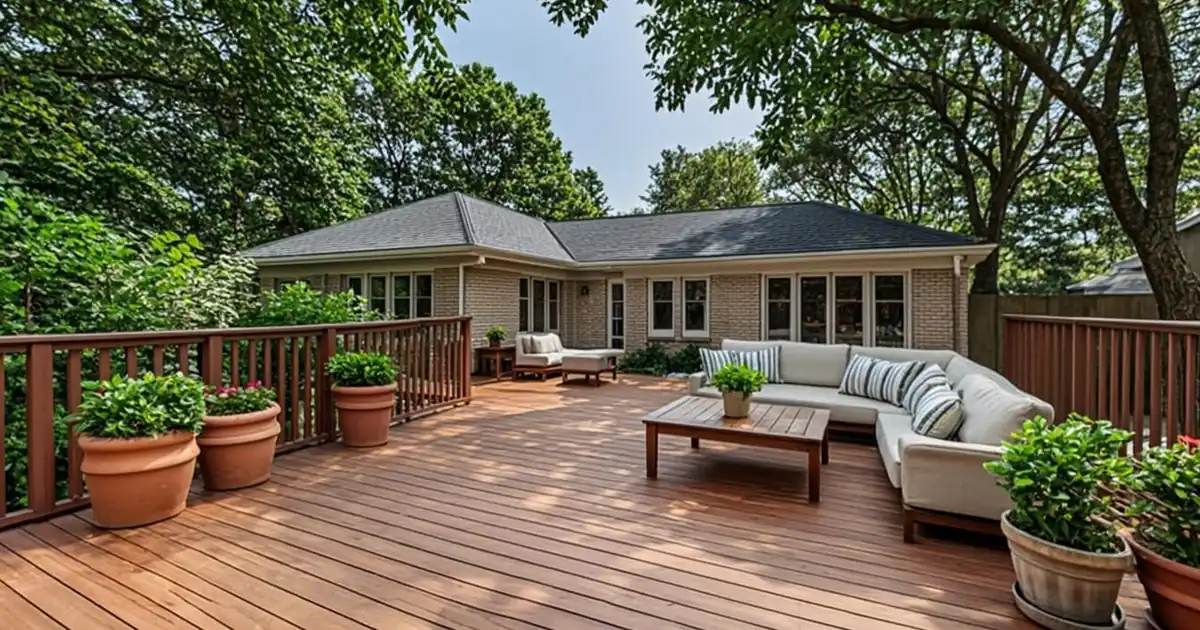
The cheapest permit is the one you never need, and the model code draws that line clearly. IRC section R105.2 exempts decks not exceeding 200 square feet in area, no more than 30 inches above grade at any point, and not attached to the dwelling (ICC R105.2 work exempt from permit). Austin publishes the same three-part test in its work-exempt list (Austin work exempt from building permits), and the Pikes Peak regional building department in Colorado applies the identical baseline (PPRBD permit not required list).
| Exemption test | Model-code baseline | What trips it |
|---|---|---|
| Area | 200 square feet or less | A deck past 200 square feet needs the full permit |
| Height | 30 inches above grade or lower | A walkout basement or sloped yard pushes a section over 30 inches |
| Attachment | Freestanding, no connection to the house | A ledger board bolted to the dwelling ends the exemption |
Two cautions before you celebrate. Zoning rules on setbacks and lot coverage still apply to an exempt deck, and the exemption covers the building permit, not a future sale: buyers and inspectors will still want the structure to be safe. If you are unsure which side of the line your yard sits on, the permit decision guide for decks (do I need a building permit for a deck) breaks the test down step by step.
Right-Size the Build to Reduce Deck Permit Costs
Square footage drives almost everything. It feeds the valuation table, it decides whether you clear the 200-square-foot exemption, and it sets how much lumber and footing work the plan reviewer has to check. A homeowner trimming a wish-list 400-square-foot platform down to a 260-square-foot eating and grilling deck typically drops the permit into a lower fee tier and shortens plan review at the same time.
Measure twice here. The area that counts is the walking surface, and an L-shaped layout can push a corner past the exemption line even when the main platform stays small. Our guide on how large a deck can be without a building permit (how large can a deck be without a building permit) covers the measurement details and the near-miss scenarios.
Height matters as much as footprint on sloped lots. A deck that reads 24 inches at the patio door can sit roughly 34 inches at the downhill corner, and once any point clears 30 inches, guards become code-required and the exemption usually disappears. Walk the perimeter with a tape before you draw anything, and check the low corner rather than the average. Slope has surprised enough homeowners that it deserves its own measurement.
Shrink the Declared Valuation, Not the Deck
In valuation-based cities, the fee follows the declared cost of labor and materials, so an honest but tight number matters. File with a material list and a realistic contractor quote rather than a padded dream number, and drop scoped-out extras like built-in benches or a pergola kit from the initial application. Miami's fee schedule, to give one example of thresholds at work, fixes a small flat fee for residential improvements valued under $2,500 (City of Miami building permit fee schedule), so keeping a minor repair project under a low line can change the fee class entirely.
One line you should not cross: do not under-declare on purpose. Many departments sanity-check your number against ICC valuation data for your square footage, and a valuation that looks manipulated can stall review or invite a recalculation with penalties. Trim the scope, not the truth.
A note on what counts toward valuation: the department generally wants the full cost to complete, materials plus hired labor, and homeowner sweat equity typically stays out of it. What you can legitimately drop is work you are genuinely deferring, like the screening wall or the outdoor kitchen rough-in, because scope you never build is review you never need.
Use Pre-Approved Plans Where Your City Offers Them
Custom drawings mean custom plan review hours, and plan review hours show up on your invoice. San Diego's development services bulletin prices decks built from pre-approved plans on their own, lower fee line, separate from standard submittals (San Diego fee schedule for construction permits). The savings vary by city, but the pattern is common enough that it deserves a phone call before you hire a drafter.
Ask your building department two questions. First, does the city maintain a library of pre-approved or standard deck drawings you can use as-is? Second, if it does not, does the state or county publish model details your designer can copy so review is a stamp rather than a redesign? Either answer can shave real review time and fee weight off the application.
There is a second discount hiding in the same conversation: revision cycles. A drawing the reviewer already trusts rarely comes back with correction rounds, and each round can carry its own resubmittal charge in cities that bill that way. Standard details are not just cheaper to buy. They are cheaper to fix.
Bundle the Work and Avoid Repeat Fees
Application fees, plan review minimums, and inspection trip charges tend to reset every time you open a new permit. If you already know a pergola, hot tub circuit, or stairs are coming in a year or two, folding them into the deck permit now usually beats paying a second application later. Portland's published fee schedules show how electrical and other trade permits each carry their own line, which is exactly the stacking that bundling avoids (Portland permit fee schedules).
The reverse is also true. Do not let a contractor talk you into a mega-permit for work you have not designed yet, because scope you file for is scope you pay review fees on. Bundle what is real, defer what is vague, and check the pergola permit decision guide (do I need a permit for a pergola) before you commit either way.
Bundling also changes how you shop. Contractors price their own permit handling, and a single coordinated submittal usually means one mobilization for inspections instead of two. Ask whoever holds the contract who pulls the permit, who pays the fees, and whether the quote lists permit costs separately. Transparency at this stage prevents the awkward conversation where the permit allowance turns out to be a guess.
Pass Inspection the First Time
Re-inspection fees are the quiet budget killer. Miss a footing inspection or fail the final and many departments charge for the return trip, typically an amount comparable to the original visit, and your timeline slips a week or more while you wait for a new slot.
Three items cause most deck failures. The ledger attachment, where the deck ties into the house, needs the correct fasteners and flashing. Footings need to match the depth and diameter called out on the approved plan, not "close enough." Guards and railings need to hold up to a real push, with openings sized so a small child cannot slip through. Walk the job against your own approved drawings the day before the inspector arrives. Ten minutes of self-inspection is the cheapest fee reduction on this page.
Scheduling discipline helps too. Book the footing inspection before the concrete truck arrives, not after, and confirm the final inspection window so the crew does not demobilize early. Departments vary on notice periods; some want a same-day call, others want a day or two of lead time. A missed window is a remobilization charge from your contractor on top of whatever the city bills for the repeat visit.
Use the City's Own Fee Tools Before You Apply
Most departments publish more than a PDF these days. San Antonio's development services department posts its current fee schedule for download (San Antonio Development Services fees page), and Greenwood Village in Colorado runs an online calculator that estimates permit fees from your project inputs (Greenwood Village permit fee calculator). Five minutes with those tools turns "roughly" into a number you can put in the project budget.
If the website leaves gaps, call the counter and ask for the fee worksheet for a residential deck of your size. Staff hand out these worksheets daily, and the worksheet shows every line item: application, plan review, issuance, and any technology or education surcharges your city tacks on. Surprises at the counter cost more than surprises anywhere else.
What Cost-Cutting Never Includes: Skipping the Permit
Every dollar saved by not filing is a liability you parked in the yard. Unpermitted decks surface at resale, insurance claims, and complaint-driven inspections, and the cure usually costs multiples of the original fee: retroactive permits, exposure penalties, and sometimes partial demolition so an inspector can see the footings. The cascade is ugly enough that we wrote a whole piece on what happens if you build without a permit (what happens if you build without a permit).
Legal cost reduction ends at the property line of honesty. Scope smaller, file accurately, use pre-approved plans, and pass the first inspection. That sequence typically keeps a deck permit inside the usual $300 to $2,000 band, and often well under it, without a single rule bent.
There is also the neighbor problem. A fence-line dispute or a drainage complaint is often how unpermitted decks get reported, and once a case file opens, the inspection is not optional. Compare that to the cost of simply filing: one application, one fee, one inspection. The legal route is boring by design.
Your Deck Permit Savings Checklist
- Run the three-part model-code tests first, usually stated as 200 square feet, 30 inches above grade, and freestanding. If your deck fits, confirm zoning setbacks and skip the building permit entirely.
- Pull the city's fee schedule or calculator before you sign a contractor quote, so the permit line in your budget matches the counter's math.
- Right-size the footprint. Every square foot you trim lowers both the valuation and the review workload, and dropping under the exemption line drops the fee to zero.
- File an honest, tight valuation with a material list attached, and leave undrafted extras out of the first application.
- Ask about pre-approved plans or standard details before hiring a drafter for custom drawings.
- Bundle future-phase work that is genuinely designed, and defer the rest to a later permit instead of paying review fees twice.
- Self-inspect ledger, footings, and guards the day before the inspector comes, because re-inspection trips are the most avoidable fee on the sheet.
- For a bigger picture on how these fees swing by jurisdiction, the state-by-state permit cost guide (building permit costs by state) puts your city's numbers in context.